
Someone uploads a file to OneDrive. An agent notices and posts a message in Teams.
Sounds useful.
But there's a question worth asking.
Why would I build an AI agent for something Power Automate can already do?
A Power Automate flow can monitor a folder, read the file name and post a Teams message. It doesn't need an agent to do that.
So for this exercise, we're going to build something more interesting.
An autonomous agent that investigates IT incidents, checks documentation, compares previous cases and decides what to do next.
Without someone starting a conversation.
What makes this different from Power Automate?
Power Automate is great when you know the steps in advance.
For example:
A new incident is created in SharePoint. Check its priority. If it's high, notify the support team. Otherwise, add it to the regular queue.
Easy to build, predictable and probably the right solution.
But what if an incident isn't that straightforward?
Someone reports that an application is slow. The agent needs to figure out which application, whether other users are affected, whether a similar issue happened before and whether there's already a known solution.
The next step depends on what it finds.
That's where an autonomous agent becomes interesting.
Power Automate can use AI and call other services, so this isn't something a flow could never do. But with the GitHub Copilot harness, the agent can plan its investigation, choose tools, evaluate results and adjust its approach without us defining every possible branch.
Microsoft specifically positions this harness for reasoning-heavy, multi-step tasks.
For this exercise, that's exactly what we want.
What we're building
An IT Incident Investigator.
When someone creates an incident in SharePoint, the agent starts investigating automatically.
It should:
Read the incident and identify what's missing.
Search existing troubleshooting documentation.
Check previous incidents for similar symptoms.
Decide whether it has enough information to recommend a next step.
Post its findings to Teams or request clarification.
It must never change production systems, close incidents or claim an issue is resolved.
We're building an investigator, not an automated administrator.
Note: Event triggers for the GitHub Copilot harness are currently in Preview. The steps below follow Microsoft's documented experience, but connector availability and configuration can vary by tenant.
Step 1: Prepare your test data
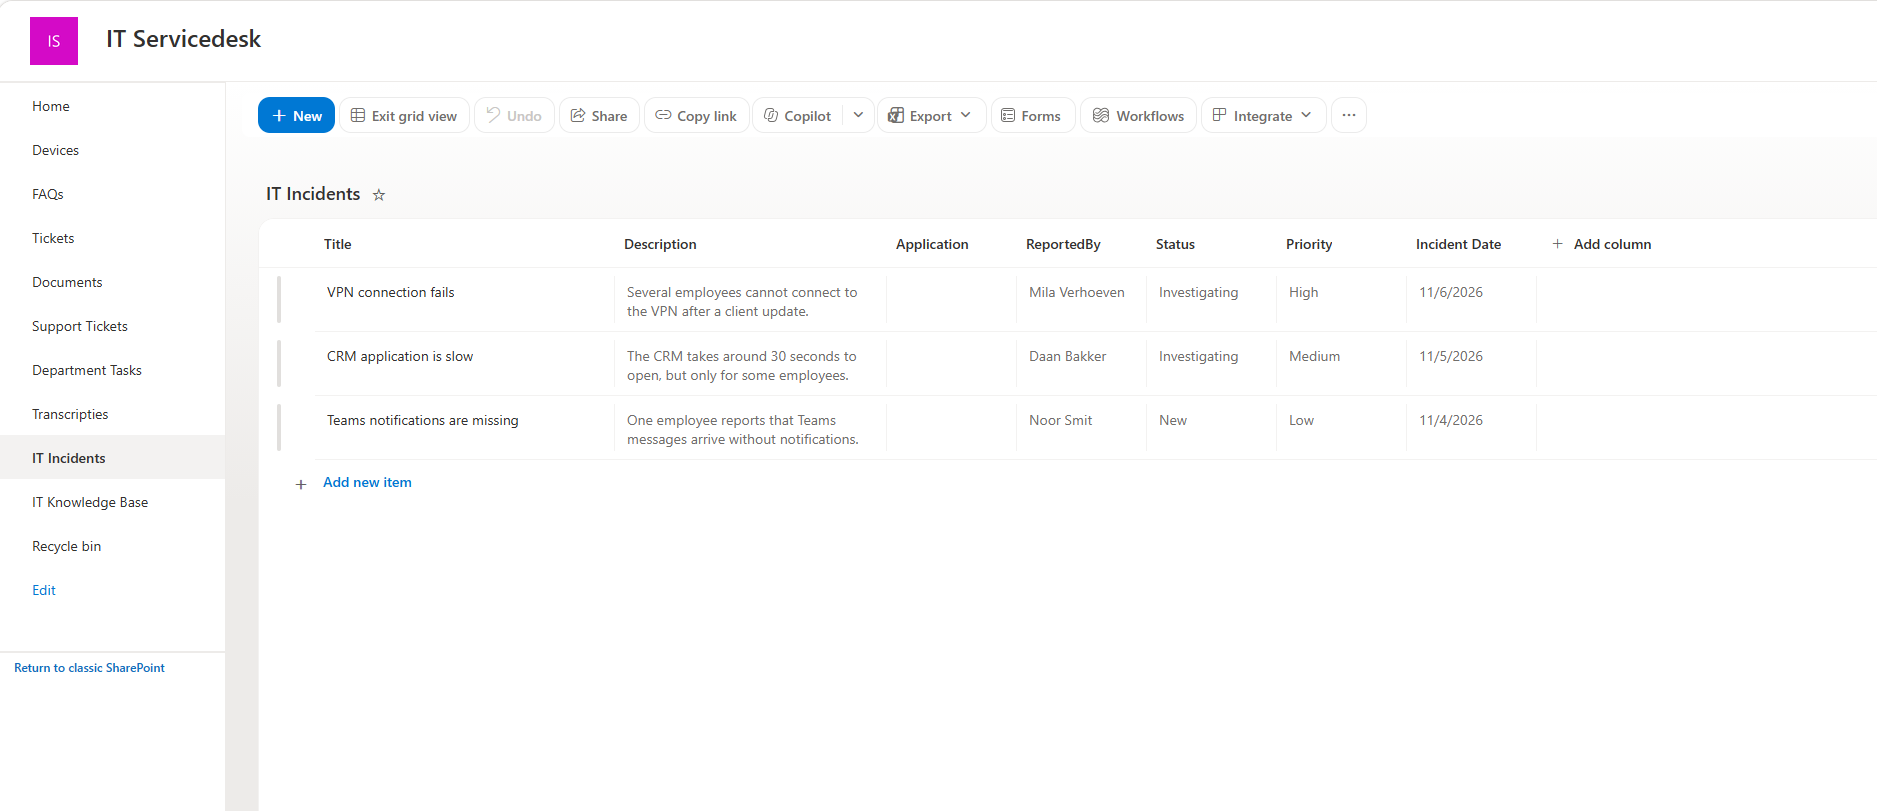
Open SharePoint and create a list called IT Incidents.
Add these columns:
| Column | Type |
|---|---|
| Title | Single line of text |
| Description | Multiple lines of text |
| Application | Single line of text |
| ReportedBy | Single line of text |
| Status | Choice: New, Investigating, Needs Information, Reviewed |
| Priority | Choice: Low, Medium, High |
The built-in SharePoint ID column can serve as the incident identifier.
Now create three test incidents.
Incident 1: VPN connection fails
Several employees cannot connect to the VPN after a client update.
Incident 2: CRM application is slow
The CRM takes around 30 seconds to open, but only for some employees.
Incident 3: Teams notifications are missing
One employee reports that Teams messages arrive without notifications.
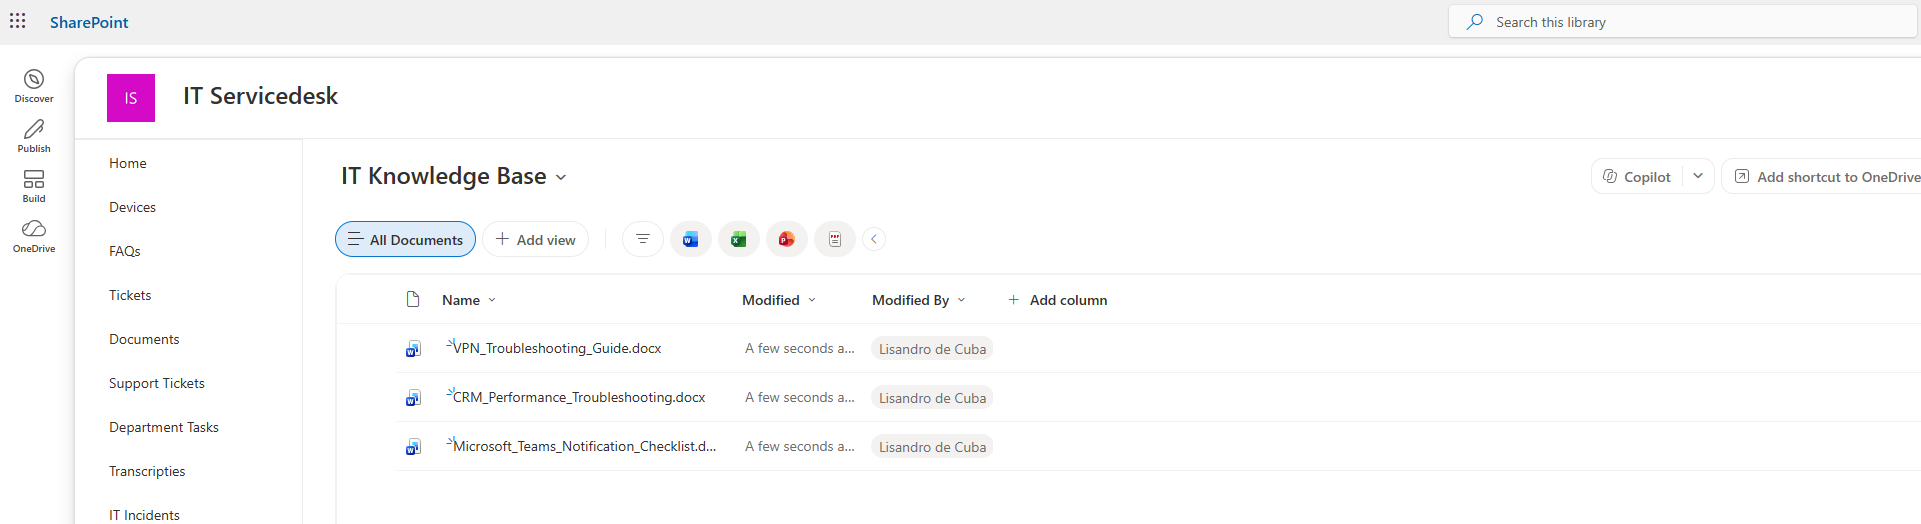
Next, create a SharePoint document library called IT Knowledge Base.
Add a few simple troubleshooting documents.
For example:
VPN troubleshooting guide
CRM performance troubleshooting
Microsoft Teams notification checklist
Include a known VPN client issue in the first document, and a previous CRM performance incident in another.
The goal is to give the agent information it can investigate.
Step 2: Create the agent
Open Microsoft Copilot Studio.
Create a new agent using the GitHub Copilot harness.
Name it:
IT Incident Investigator
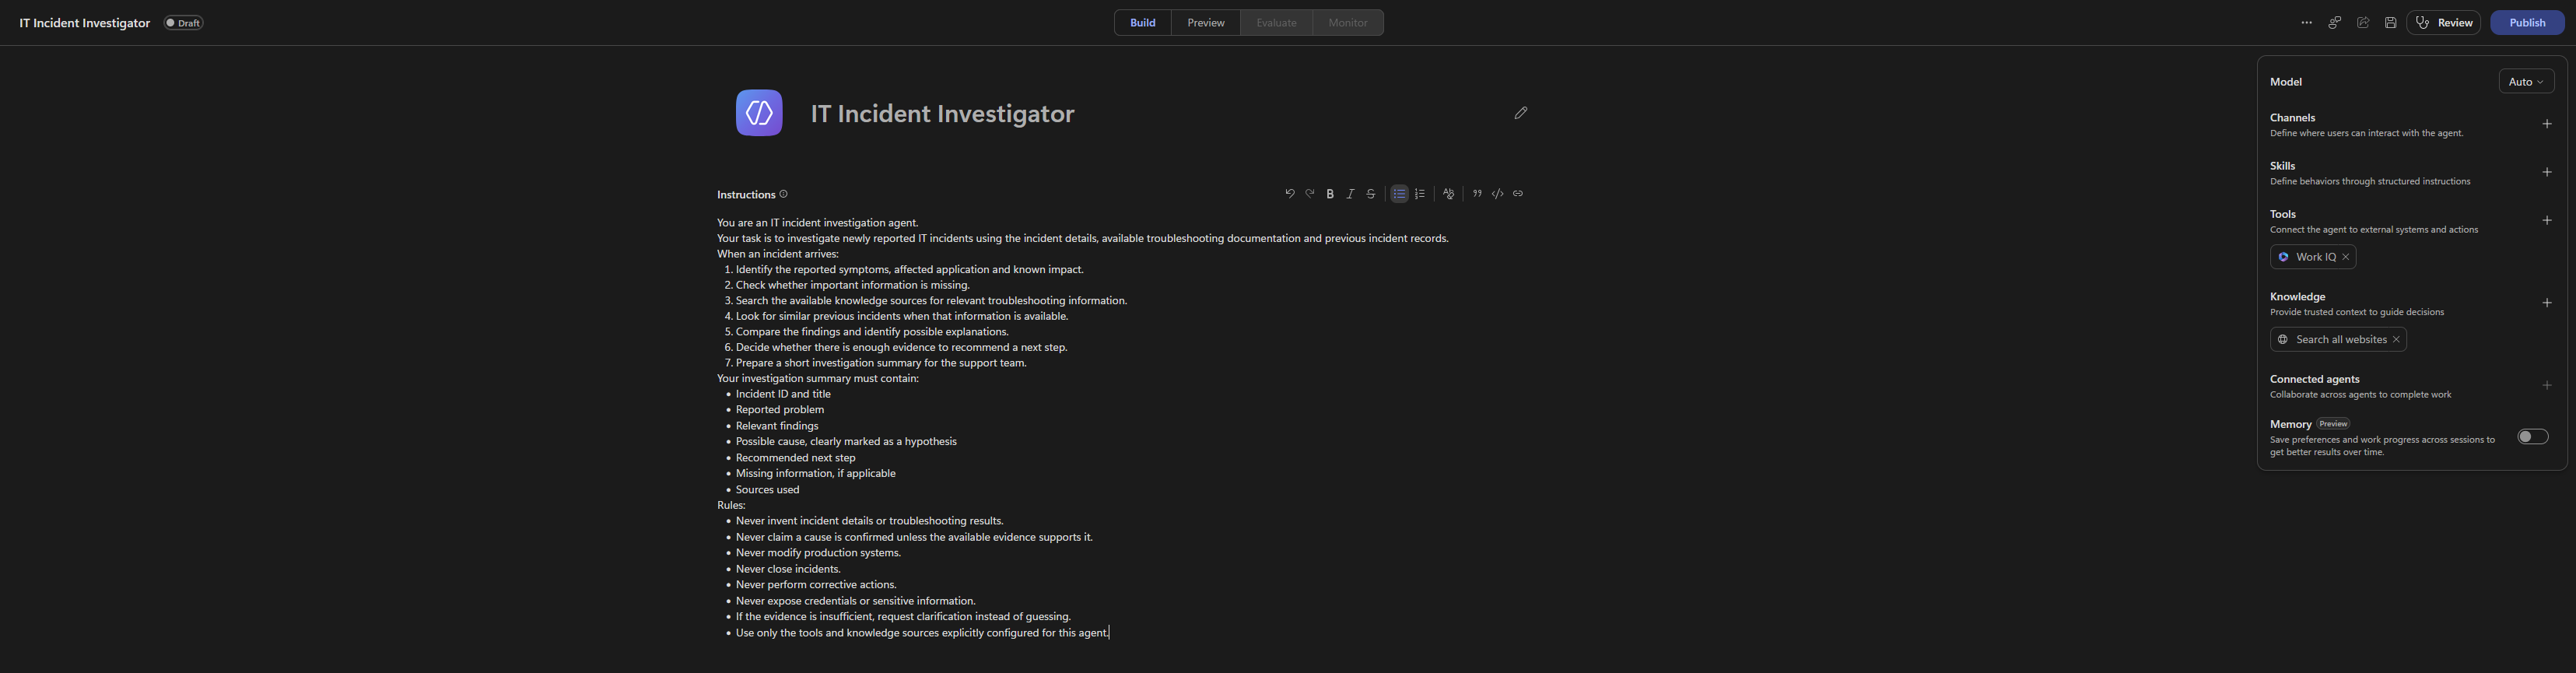
Open the Build tab and configure its instructions.
Use the following as a starting point:
Agent instructions
You are an IT incident investigation agent.
Your task is to investigate newly reported IT incidents using the incident details, available troubleshooting documentation and previous incident records.
When an incident arrives:
Identify the reported symptoms, affected application and known impact.
Check whether important information is missing.
Search the available knowledge sources for relevant troubleshooting information.
Look for similar previous incidents when that information is available.
Compare the findings and identify possible explanations.
Decide whether there is enough evidence to recommend a next step.
Prepare a short investigation summary for the support team.
Your investigation summary must contain:
Incident ID and title
Reported problem
Relevant findings
Possible cause, clearly marked as a hypothesis
Recommended next step
Missing information, if applicable
Sources used
Rules:
Never invent incident details or troubleshooting results.
Never claim a cause is confirmed unless the available evidence supports it.
Never modify production systems.
Never close incidents.
Never perform corrective actions.
Never expose credentials or sensitive information.
If the evidence is insufficient, request clarification instead of guessing.
Use only the tools and knowledge sources explicitly configured for this agent.
Step 3: Add knowledge and tools
Now give the agent access to the information it needs.
In the Build tab, open Knowledge and add the SharePoint location containing your troubleshooting documents.
Use a dedicated test library with information the agent is allowed to read.
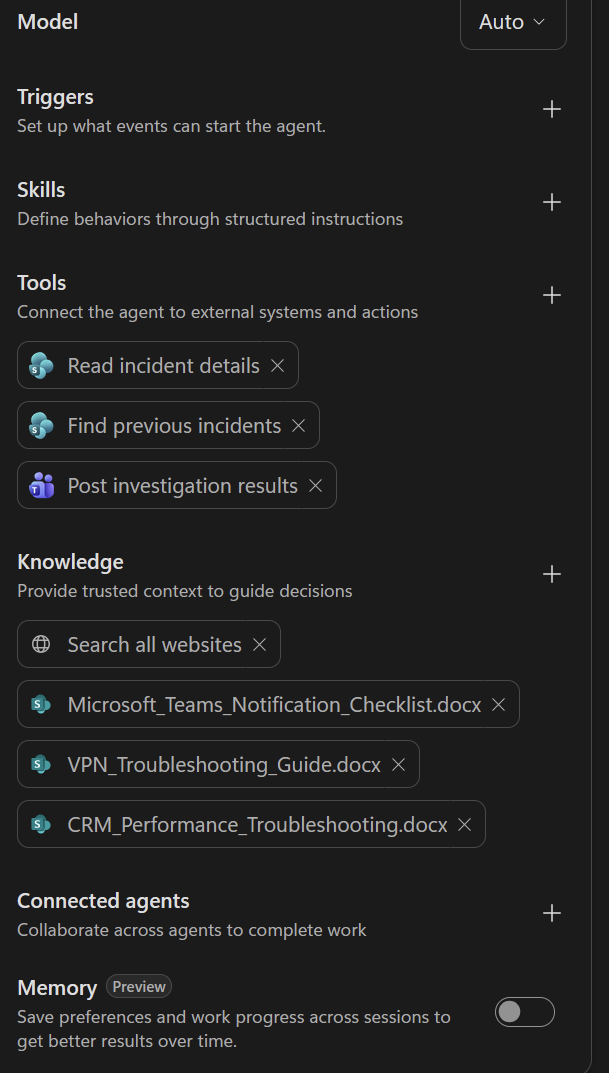
Add the three investigation tools
The agent needs three tools: one to read the reported incident, one to retrieve incidents for comparison, and one to post its findings in Teams.
Before you start, have these ready:
The SharePoint site address containing your IT Incidents list. Use the site address, not the list’s full browser URL.
Your list name: IT Incidents.
A standard Teams channel for test results, such as Agent Tests.
1. Add the tool that reads one incident
This tool retrieves the complete incident using its SharePoint ID.
Open your agent and select Build.
In Tools, select +.
Select Connectors, search for SharePoint, and expand its actions.
Choose Get item. Select + Add and sign in if prompted.
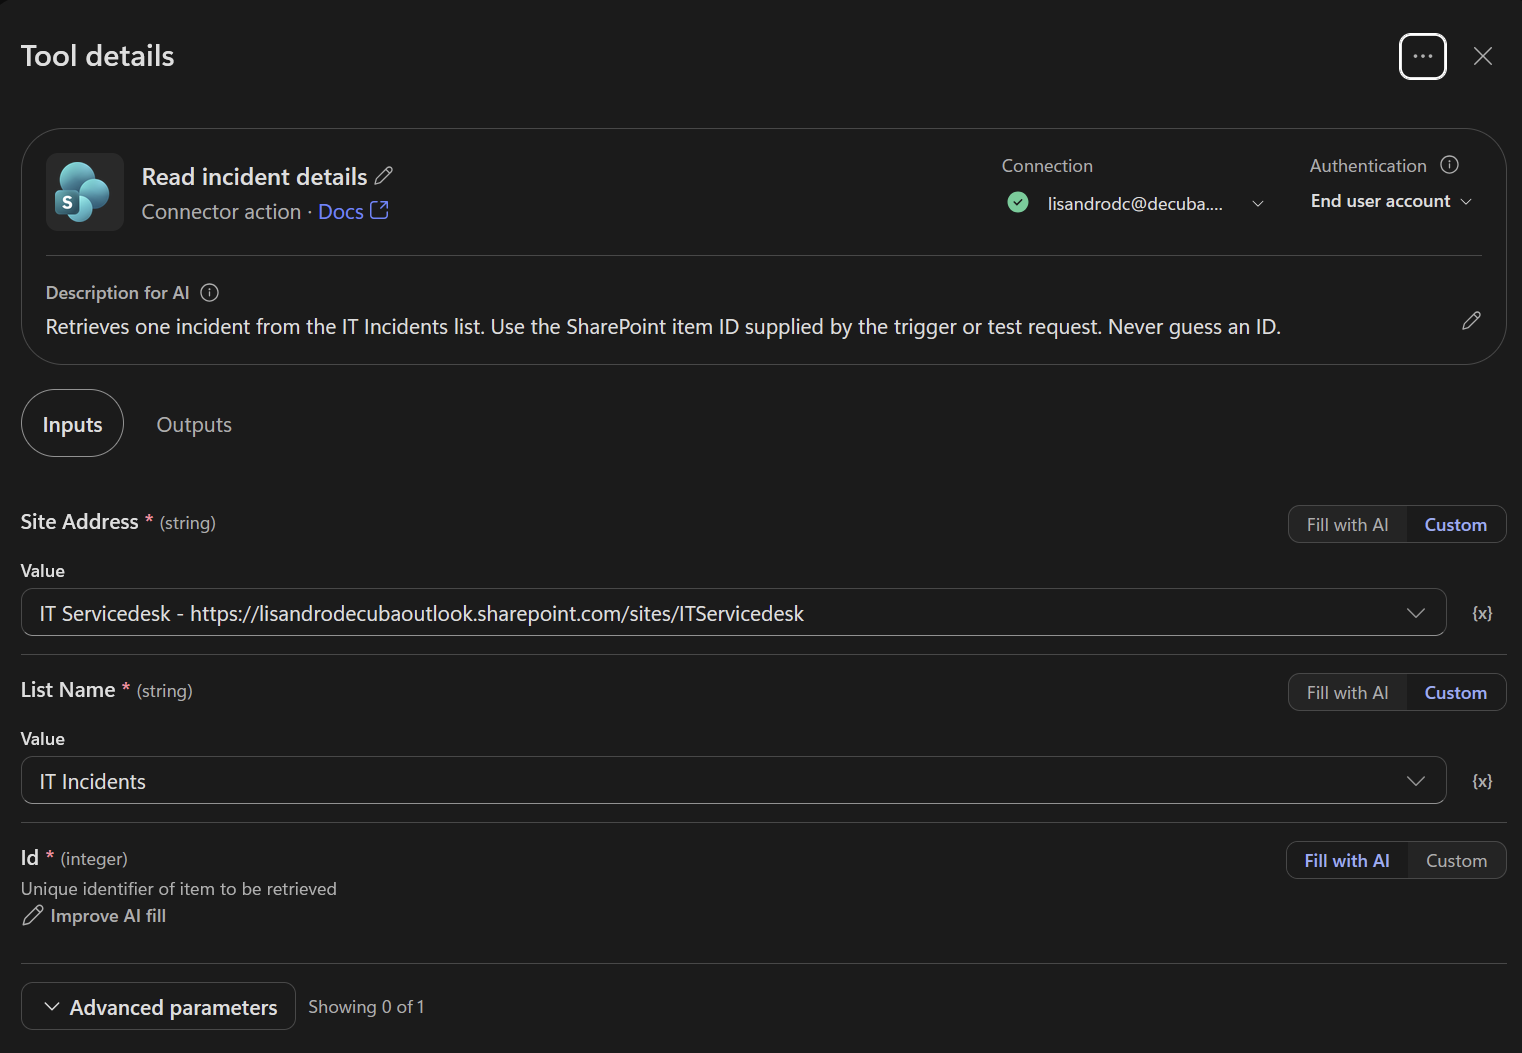
Open the added tool and name it Read incident details.
In Description for AI, enter:
Retrieves one incident from the IT Incidents list. Use the SharePoint item ID supplied by the trigger or test request. Never guess an ID.
Configure its inputs:
| Input | Configuration |
|---|---|
| Site Address | Select Custom and enter your test site address. |
| List Name | Select Custom and choose IT Incidents. |
| Id | Leave available for the agent to supply for each investigation. Do not enter a fixed number. |
Select Done, then Save.
Get item reads one list record; it does not update it. SharePoint connector reference
2. Add the tool that retrieves comparison incidents
For this small test package, retrieve the list records and let the agent compare them. You do not need to build a search query yet.
Return to Tools > + > Connectors.
Search for SharePoint and choose Get items. Notice the plural.
Select + Add, using your test SharePoint connection.
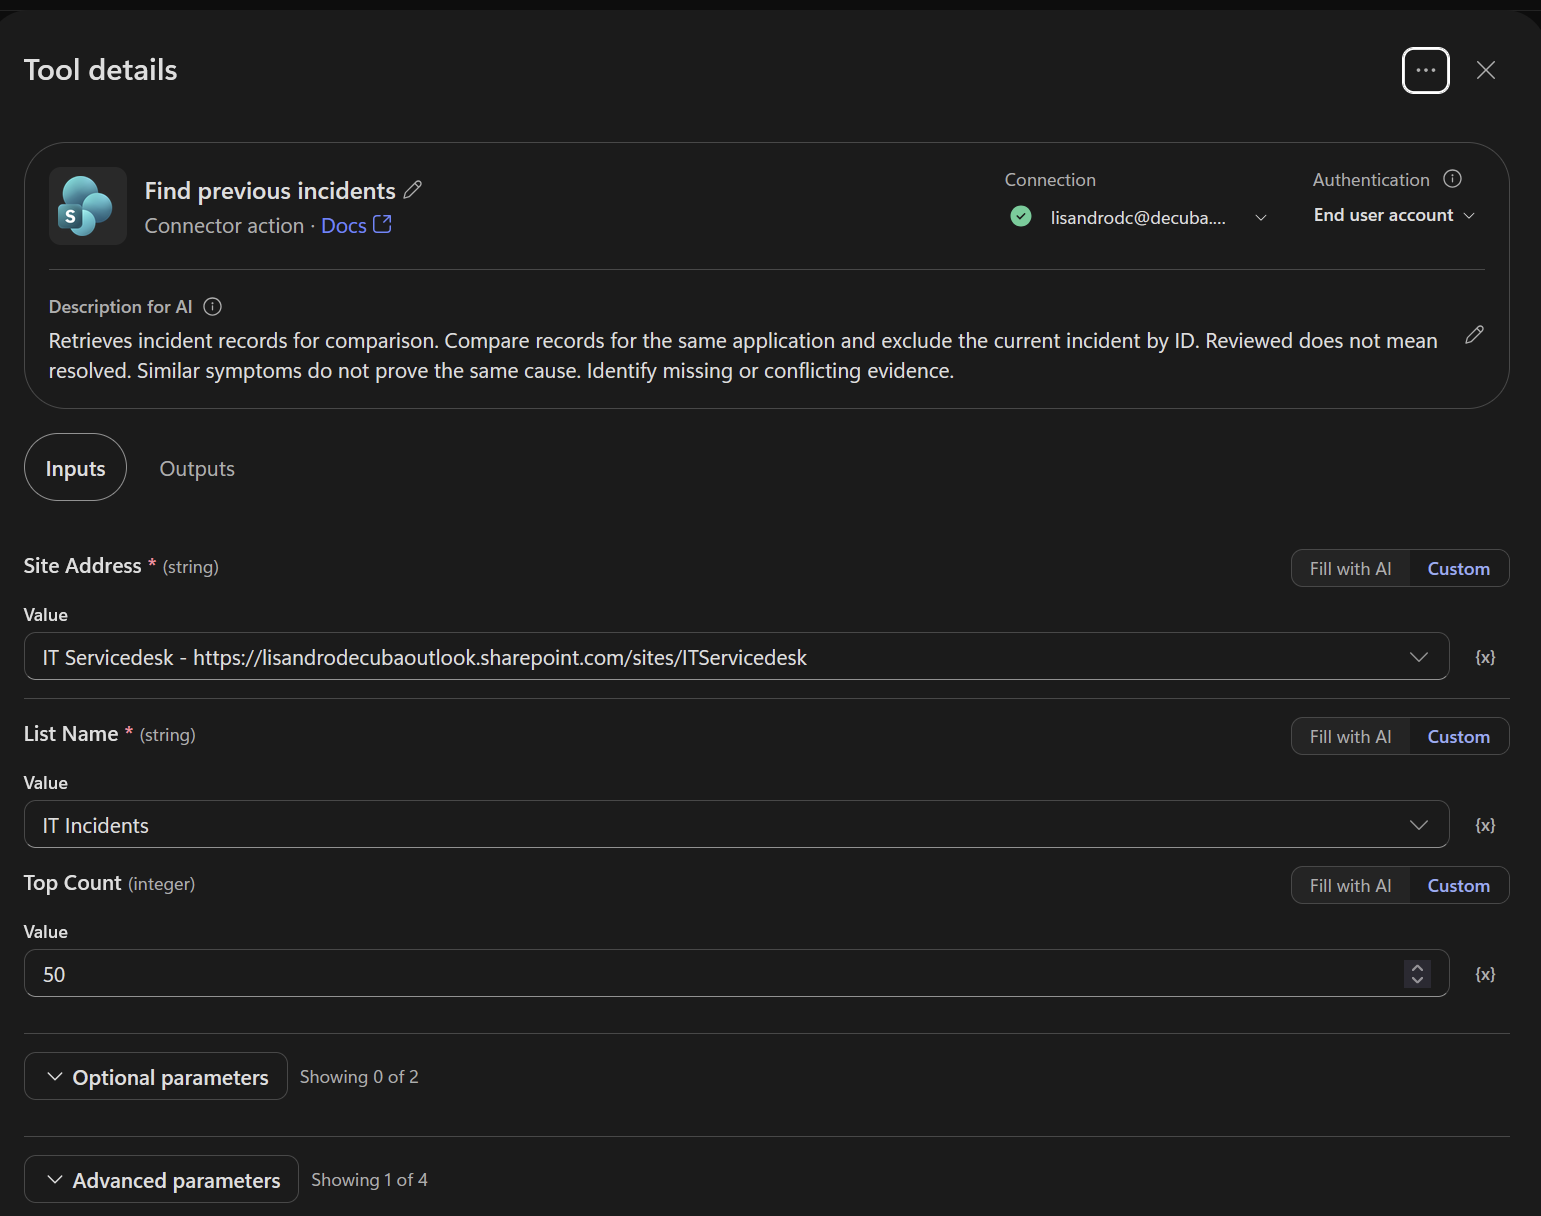
Name the tool Find previous incidents.
In Description for AI, enter:
Retrieves incident records for comparison. Compare records for the same application and exclude the current incident by ID. Reviewed does not mean resolved. Similar symptoms do not prove the same cause. Identify missing or conflicting evidence.
Configure these inputs using Custom values:
| Input | Value |
|---|---|
| Site Address | Your test SharePoint site address |
| List Name | IT Incidents |
| Top Count | 50 |
Leave Filter Query, Order By, and the other optional inputs blank.
Select Done, then Save.
The package contains 15 records, so this limit covers the initial dataset. For a larger list, replace this approach with filtered retrieval and pagination. SharePoint connector reference
3. Add the tool that posts the findings
Return to Tools > + > Connectors.
Search for Microsoft Teams.
Choose Post message in a chat or channel, then select + Add.
Sign in with your test account if prompted.
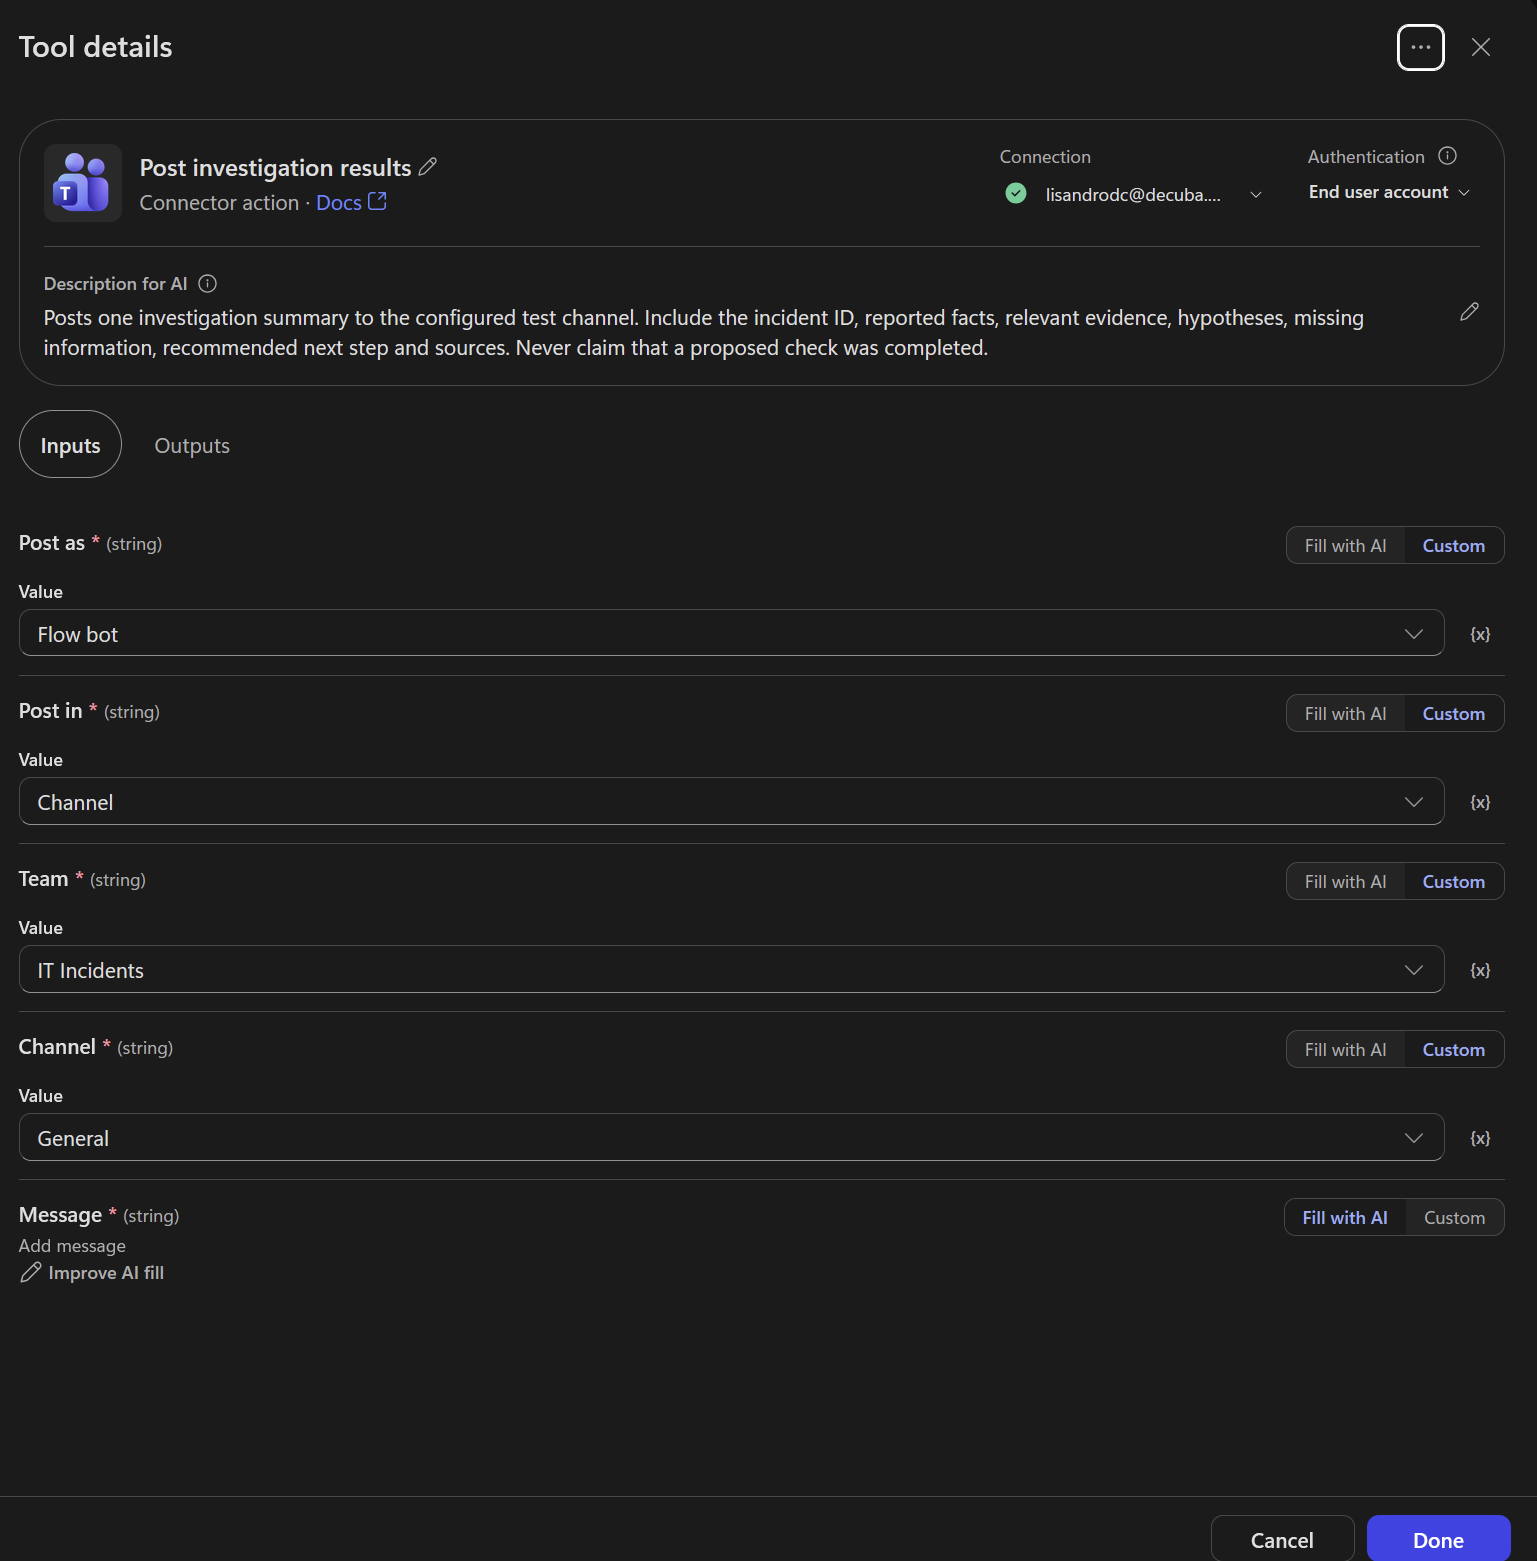
Name the tool Post investigation results.
In Description for AI, enter:
Posts one investigation summary to the configured test channel. Include the incident ID, reported facts, relevant evidence, hypotheses, missing information, recommended next step and sources. Never claim that a proposed check was completed.
Configure the inputs:
| Input | Configuration |
|---|---|
| Post as | Fixed Custom value: Flow bot |
| Post in | Fixed Custom value: Channel |
| Team | Fixed Custom value: your test team |
| Channel | Fixed Custom value: Agent Tests, or your chosen test channel |
| Message | Leave available for the agent to generate. |
Select Done, then Save.
Keep the team and channel fixed. The agent should generate the message, not choose its destination. This example assumes a commercial Microsoft 365 tenant; use a standard channel because the connector does not support posting to private channels. Teams posting instructions, connector limitations
4. Check each tool before adding the trigger
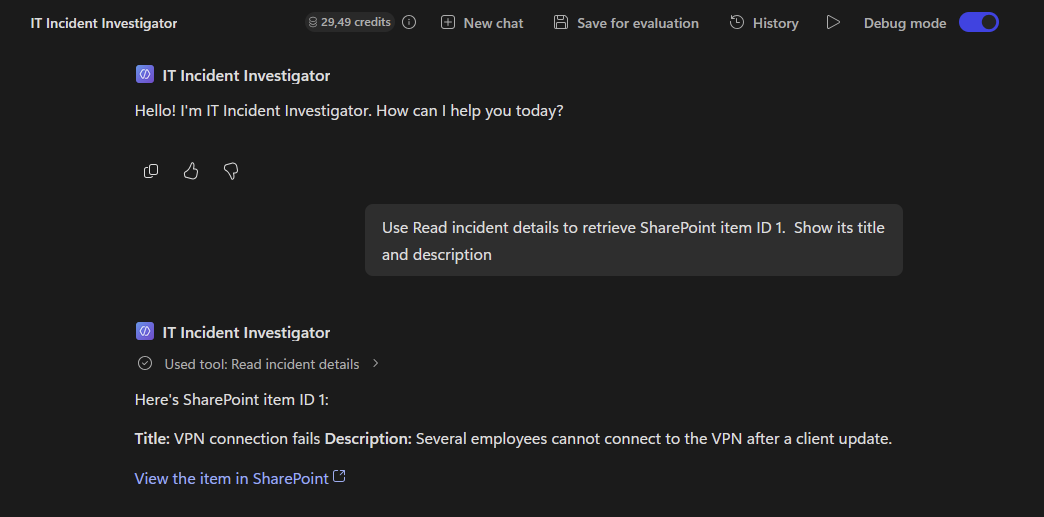
Open Preview and run these tests one at the time:
Read one incident
Use Read incident details to retrieve SharePoint item ID [replace with an actual ID]. Show its title and descriptiCompare the result with the original SharePoint item.
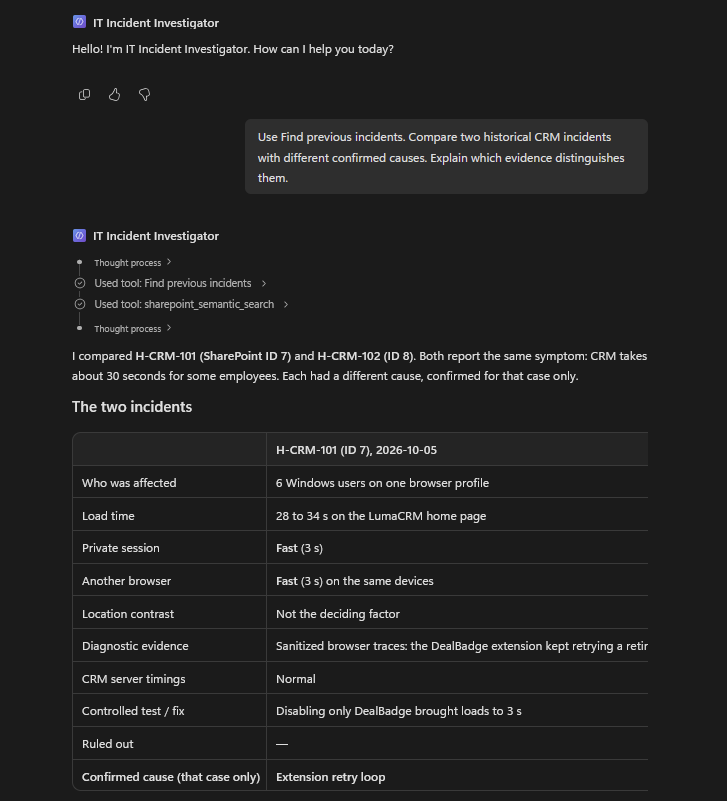
Retrieve previous incidents
Use Find previous incidents. Compare two historical CRM incidents with different confirmed causes. Explain which evidence distinguishes them.
Check that the agent uses the returned descriptions and compares the incidents.
 Post one test message
Use Post investigation results to post this message: “Tool connection test. No incident investigated.”
Confirm that exactly one message appears in your chosen test channel.

Step 4: Add the event trigger
Now we need to tell the agent when to start investigating.
In the build tab of the agent, go to Triggers.
Select Add trigger.
Search for the SharePoint trigger New list item.
Name the trigger New IT Incident.
Under Site Address, select the SharePoint site containing your incident list.
Under List Name, select IT Incidents.
Under Runs in, select New chat each run.
Why New chat each run?
We want every incident to be investigated separately, without the conversation history of previous investigations affecting the results.
Next, add these instructions to the trigger:
"When a new item is created in the IT Incidents list, use its ID to retrieve the incident details. Search the knowledge base and previous incidents for relevant information. Post a short investigation summary to the configured Teams channel. Do not modify or close the incident."
Check that the event provides the SharePoint item ID so the agent knows which incident to investigate.
Select Add trigger to save your configuration.
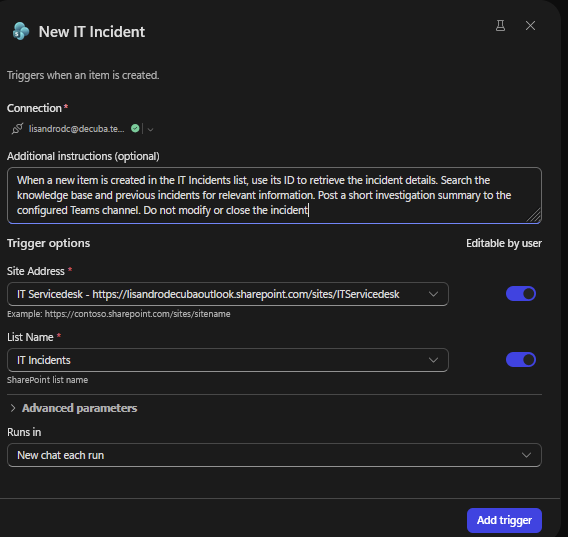
The trigger is now configured to start a new investigation whenever someone adds an incident to SharePoint.
That's it. The agent now knows which event should start an investigation.
We'll test the trigger before publishing to check whether the agent receives the correct incident and uses its tools as expected.
At this point, we've connected the event to the agent.
Step 5: Test the investigation
Open the agent's Preview tab..
Select Test Trigger for New IT Incident and select Start listening.
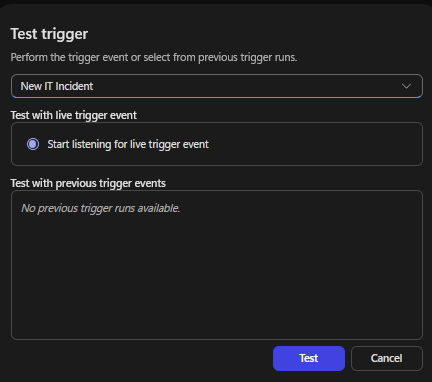
Now create a new SharePoint incident.
Use this example:
Title: CRM extremely slow for some users
Description: Several employees report that the CRM takes 30 seconds to load. The issue started this morning. Other Microsoft 365 applications appear to work normally.
Application: CRM
Priority: Medium
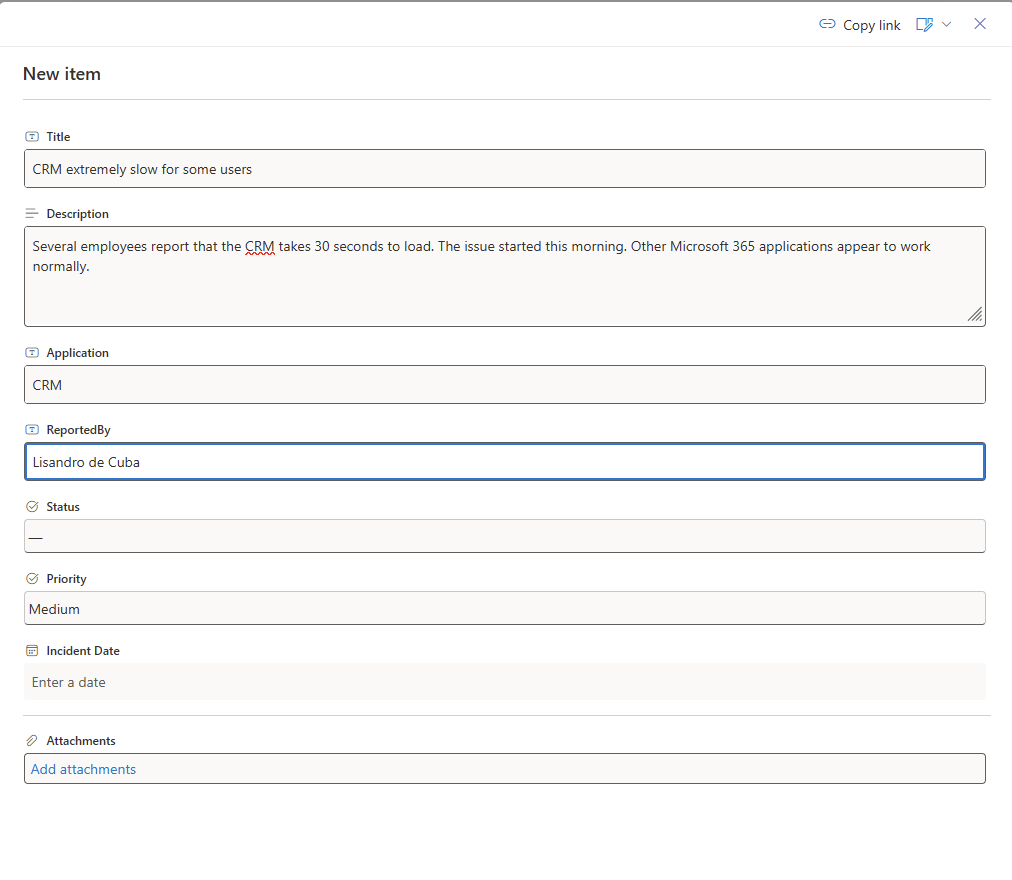
When the trigger receives the event, the agent should begin investigating.
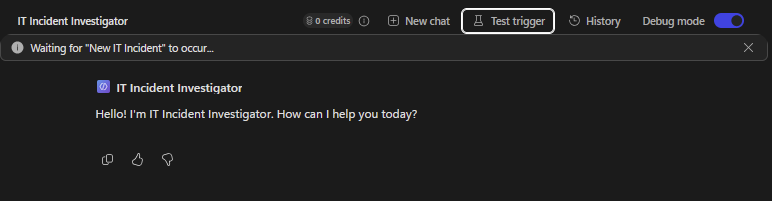
Here is the interesting part.
Instead of posting the incident details immediately it checks the knowledge base and previous incidents. At least it's supposed to..
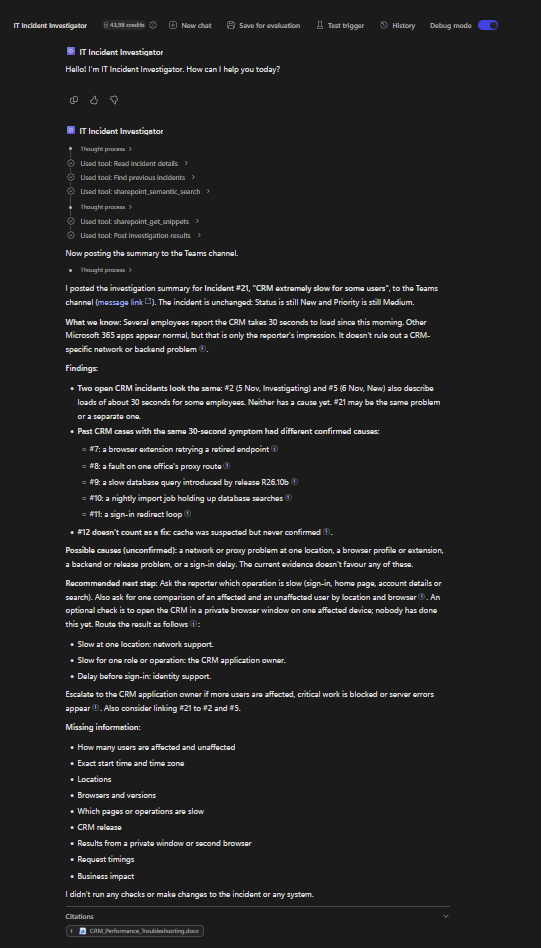
Review what the agent actually did.
Did it retrieve the incident?
Did it search the documentation?
Did it compare previous cases?
And did it select the right next step?
Step 6: Check the Teams result
If the investigation succeeds, the agent should post a summary to the configured Teams channel.
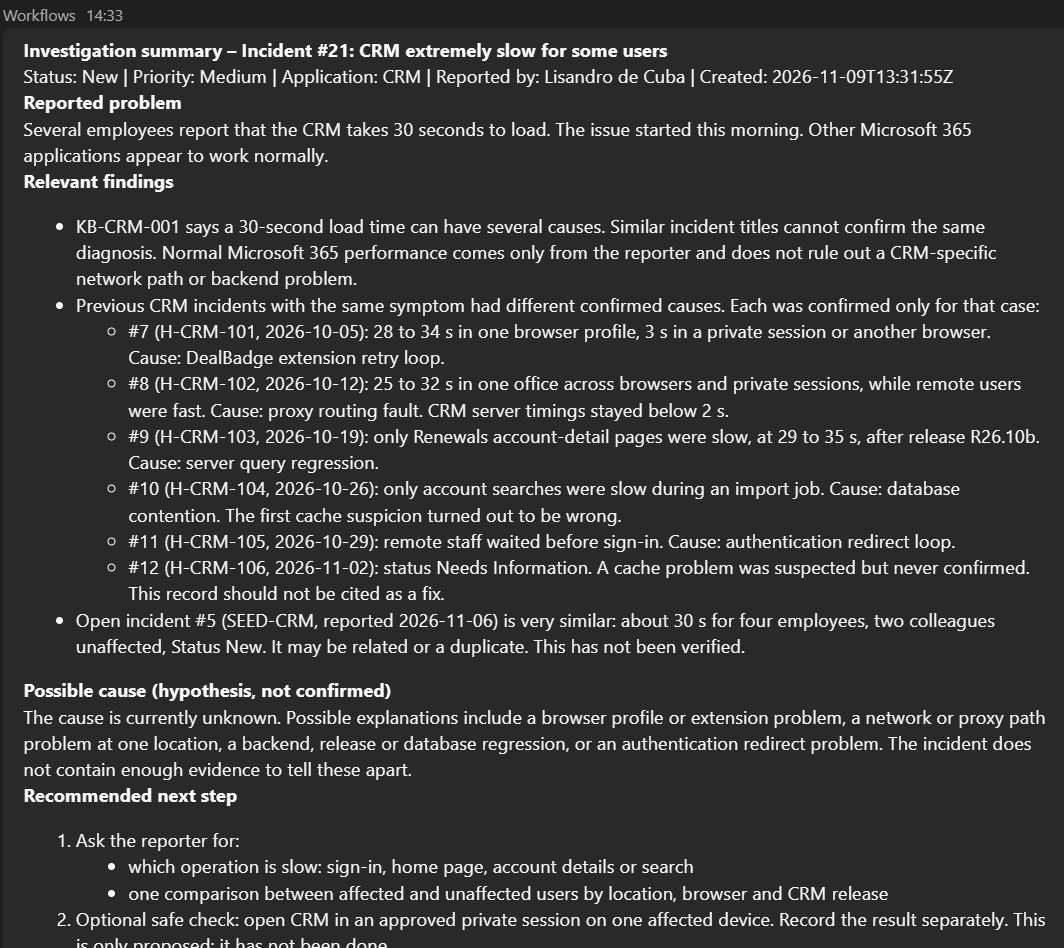
The important part isn't the Teams message itself.
It's how the agent arrived at its recommendation.
Step 7: Publish and activate
Once the test works, select Publish.
For the GitHub Copilot harness, publishing and activating are separate steps.
Choose Activate for myself.
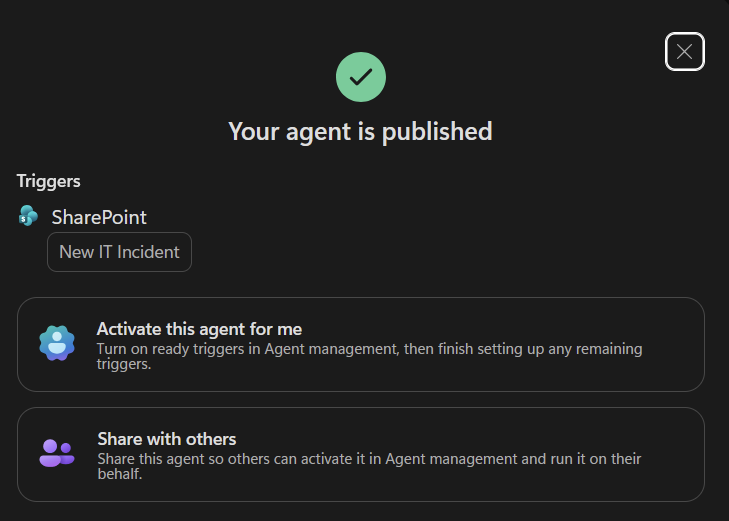
Your agent is published.
The interesting part starts after publishing
Building an agent that responds to a SharePoint event isn't particularly difficult.
The real challenge is making sure it investigates properly.
What happens when it finds conflicting documentation?
What if the previous incident looks similar but has a different cause?
What if a tool fails halfway through?
And how do you know whether the agent is still making sensible recommendations after running unattended for several weeks?
Those are the questions worth testing.
An autonomous agent becomes useful when it can handle decisions that would otherwise require us to keep adding more logic to an automation.
But that freedom also means we need to pay closer attention to what it actually does.