
Basics: Assigning Microsoft Copilot Licenses
Getting a Copilot license onto a real user, the actual admin steps, nothing about strategy or rollout planning here, that's a separate post.Before you start
- Global admin, License admin, or User admin role in your tenant
- Microsoft Copilot licenses already purchased (through the admin center, a partner, or your account team)
- The user already has a base Microsoft 365 license, Copilot is an add-on, not standalone
Step 1: Go to the licensing page
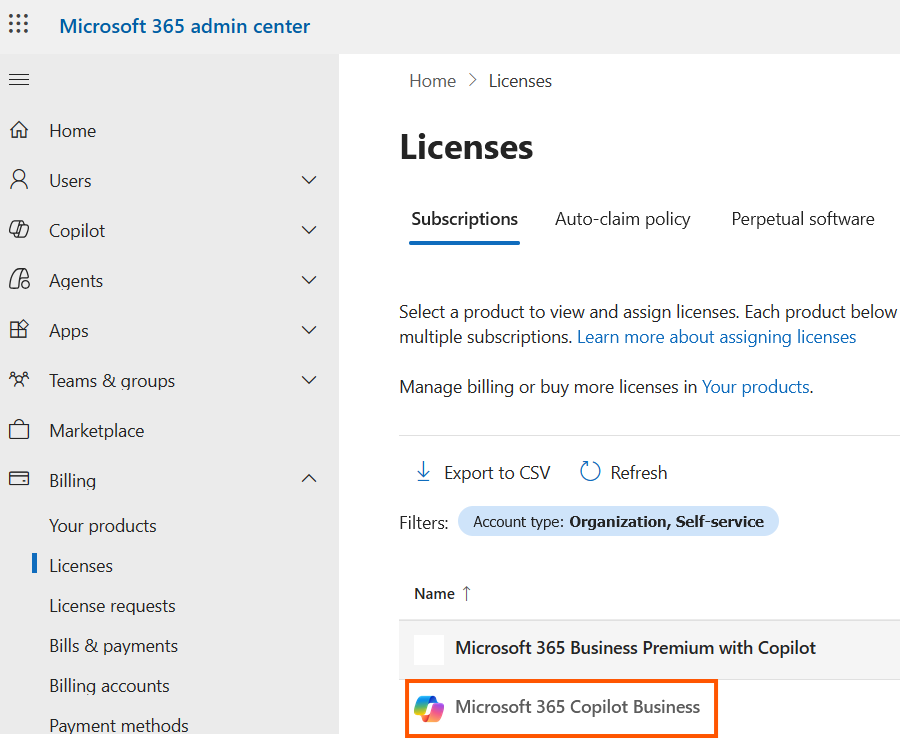
Sign in to the Microsoft 365 admin center at admin.microsoft.com. Go to Billing > Licenses, then select Microsoft 365 Copilot Business.
Step 2: Assign to a user
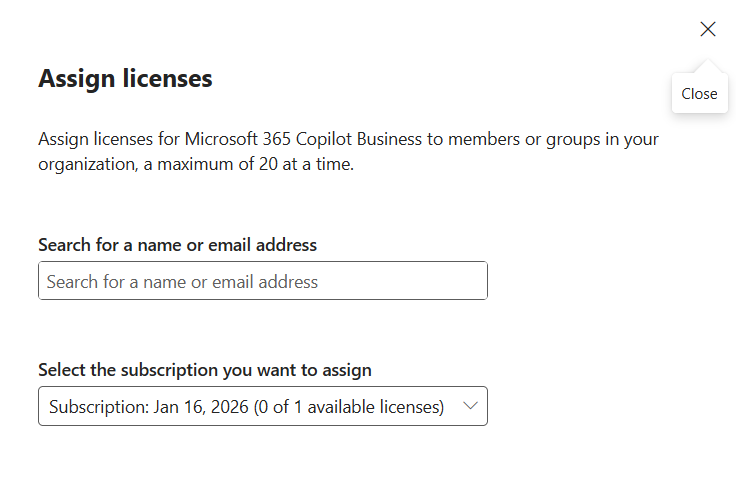
From the product details page, you can assign licenses to individual users or to a group. For more than a handful of people, assigning through a security group is far less tedious to manage later than clicking through users one by one.
Step 3: Confirm it landed
Go to Users > Active users, select the person, and check their assigned licenses. If it's there, they're licensed.
Step 4: Give it a minute (or up to 24 hours)
Copilot doesn't always appear instantly inside the apps. Some apps need up to 24 hours, and the user may need to restart or refresh the app for it to show up on the ribbon or in a chat pane.
One thing worth checking before you assign in bulk
Copilot licenses can't be assigned to guest or cross-tenant users. If you're planning a bulk assignment through PowerShell or a group, make sure whatever list you're working from doesn't include any.